

How to install a commercial kitchen faucet for optimal performance?
Most people may think installing a new faucet in the commercial kitchen will be a simple plumbing matter, but that is no where near the truth. The method that is used to install the new faucet is going to directly affect the faucet's overall performance, longevity, and reliability. Remember, a commercial kitchen faucet is a tool that is used at a high performance level and is not just a simple fixture. Giving the faucet installation the same care that would be given to an important piece of cooking equipment will make the faucet able to withstand the fast-paced workload, high temperatures, and thoroughly cleaning that all exist in a professional kitchen atmosphere. If an installation is rushed, or not done properly, the result will be leaks, high-water pressure, rapid wear of equipment, and all of the above will cause unwanted downtime. The following guide will demonstrate how to go from a box of parts to a reliable asset for your sink.
Preparing for Pre-Rinse Installation
The most preparation takes place before you pull out any tools. Successful instalation is built on preparation. Any site assessment starts with a wall. Consider the wall above the sink. Is it supple drywall, tiles, or concrete? Make sure the wall can support the weight of a faucet, especially with the pre-rinse hose pulled under tension. Know where the studs are, as anchoring directly into them is the strongest method. Then, find the hot and cold water supply lines. Make sure the lines are in good condition with shut-off valves as well as positioned in line with the faucet's inlet. Measuring the distance between the supply lines and the faucet's height is important to avoid excess pressure on the connections.
Next, take the supplied toolbox and the faucet you used the installation guide for and completely unbox everything. Take the spout, handles, mounting bracket, screws, gaskets, supply hoses, and the pre rinse sprayer assembly and take everything out. Place the components on a flat surface and make sure to check against the manufacturer’s parts list. It is better to go looking for missing supplied pieces before you start to work on the installation. Get an understanding of the parts and how they go together by looking at the installation guide. Get the tools you will use in the job and get ready. Always use a straight level to get a correct cut out for the job. You will need adjustable wrenches, a screwdriver, some plumbers tape, and a drill if there is new mounting of the sprayer. You most turn off the water supply to the faucet and relieve old water pressure, by turning the old faucet on and off.
How to Install Mount Bracket Correctly and Safely
Now that you’ve finished the planning and preparation, you can move on peace of mind to the next step, oriented to execute a precision and secure installation where the primary aim is to obtain a solid mount and drip-tight connections. If it is a wall-mounted model you can start by holding the mounting bracket or the mounting templates against the wall. Take extra care using your level to make sure that the bracket is dead level. An unlevel faucet is a horrible sight, and can also cause problems with hose retraction and excessive strain on the connections. Go ahead and make your drill hole marks, and then firmly secure the mounting bracket to the wall. It is best to mount directly to the wall studs where possible. Ensure you use a tile drill bit and appropriate anchors to avoid tile cracking and secure a solid hold at the wall.
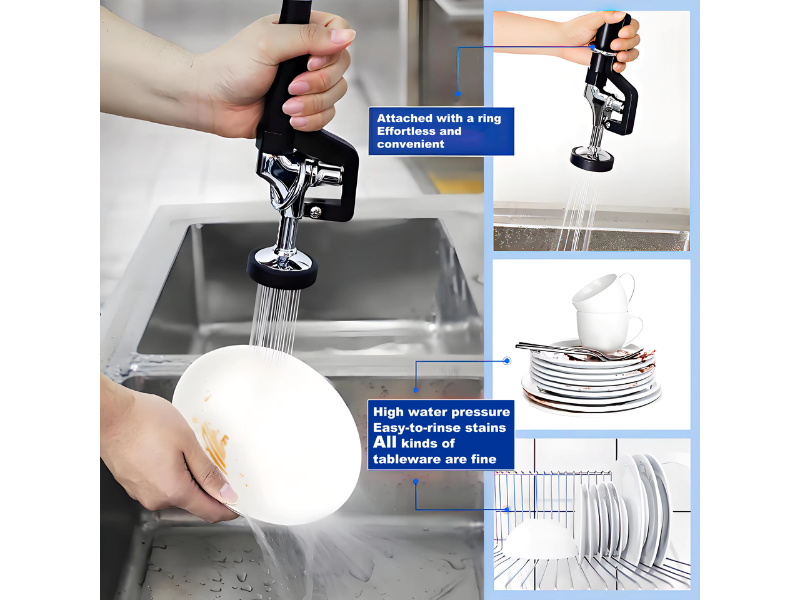
Once the bracket is secured, you can usually attach the main faucet body from the front. Next, from under the sink, connect the water lines. Using braided stainless steel hose connectors is a pro tip if they aren't already included. They are a lot more durable and kink-resistant than the commonly used rubber hoses. To ensure a tight seal, apply plumbers tape clockwise on all threaded inlets on the faucet. Hand tighten each threaded connection, then finish with a gentle quarter to half turn with a wrench. The mantra is snug, not super tight. This is a common area where people go wrong and over-tighten, stripping threads or cracking fittings. Now connect the hose for the pre-rinse sprayer to its diverter valve per the instructions, and make sure the hose is not kinked or bent at a sharp angle. A quality commercial kitchen faucet is designed for ease of use and should make these connections straightforward and intuitive.
Examining, Adjusting, and Concluding Checks
Prior to completing the task, this important step makes certain that everything functions according to plan, and this step identifies minor details that can be fixed before they turn into larger issues. Gently reopen the primary water supply valves. Do not operate the faucet immediately. Rather, you need to be a leak detective. Scrutinize all the junctions you just installed, including the crossing points of the supply hoses and the faucet as well as the shut-off valves, the junction of the sprayer hose, and the mounting base. Search for any drips, water seepage, or moisture. Tackling a small leak now is a minor issue; dealing with one later can lead to major water damage.
When a dry install has been confirmed, flow testing will be next. Turn on the hot and cold handles at the faucet spout and let the water run for 1 minute to remove any foreign material from the newly installed lines. While the water is running, feel the faucet stream to check for a consistent and strong flow. After that, turn on the pre-rinse sprayer and try both of the functions to check for a strong stream and a steady flow. Next check the diverter valve to make sure it changes positions without any issues. Then ensure the hose is retracting and extending without any resistance, and that the handles on the hose are moving freely. While doing these steps, listen for hammering and whistling sounds which are indicators of pressure problems in the lines. This completes the quality control steps for the water lines to complete the install.
Keeping Up Peak Performance Over Time
The job isn't done just because there's water coming out. Setting your faucet up for peak performance for years to come will involve some initial tweaks and some simple maintenance afterward. First, familiarize yourself with the parts you installed. For example, if you installed ceramic disc cartridges, they are built to last and are set and forget. If you have separate cartridges or valves for hot and cold, those will be self regulating. Don't over tighten your handles, just a small turn and the flow will be fully opened or closed.
Take time to inform your kitchen staff about how to take care of the new fixture. Make sure to instruct them on how to properly dock the pre-rinse sprayer so that it is not hanging down and is not damaged. Let them know that while the faucet is strong, it is not an acceptable hook for an apron or a towel. For daily care, a wipe down with a soft cloth and a mild cleaner is all that is necessary to keep the finish. It is important to avoid abrasive pads or harsh cleaners because they can damage the fixture. If you have hard water, keep an eye on the aerator or the spray head for the buildup of minerals on the hard water. It can be beneficial to know how to access and clean these small pieces to avoid gradually losing water pressure. Lastly, keep the installation manual and model information where you can access it easily. If a problem occurs years later, it is helpful to have that information to find the exact replacement cartridge or part to reduce downtime. A properly maintained and installed faucet is an investment that results in a dependable faucet for years.